Quote of the Week

I've learned that people will forget what you said, people will forget what you did, but people will never forget how you made them feel.

Maya Angelou

Sunday, May 30, 2010

Sunday Sketch and a few other Challenges

This is my last project for PWCO today.  I am in need of a little creative break.  Summer is a time for my family and kiddos.  You may notice over the next few months that my blog will be a bit quieter and when I do post it may be with a bit of scrapbooking.  My daughter has expressed an interest and I have missed doing it myself. I will be back in full force once the summer is over.  Who knows.  I'm an early bird so I may be posting just as much.  The good thing is that I have that option.  I'm lucky!

So onto the sketch and project. The sketch is a square card with a flower. I used another fan shaped flower from my tutorial over at DCRU yesterday.  (you have to scroll down a bit...long tutorial:). I made a BIGGER flower for this card though.  The paper is by MME Beloved Collection.  I really love that I can use "Valentine's" paper year round.  I created the paper roses using Coredinations Whitewash Collection.  I really need to do more with this paper.  It's fun!  I also created some tulle roses on the side with a jeweled center.  Remember that you can click on the photos for a closer look.  My handle is tulle and a natural fiber ribbon that I have had forEVER!  You can find directions for the origami bag HERE.  You can watch an animation (recommended) or just use the printable diagram sheet. I decided to fold the handles down from the original pattern and make my own.  I also added ScorTape to keep my bag together.  My origami stinks!  Tape is my friend.

This is for the 3D challenge over at PCP this week.  The Pink Elephant Challenge is to use Orange.  Do you think Peach counts?  I'm also stretching it a bit to include in the Pile It On challenge~ Eat your veggies.  Let me 'splain....You buy veggies at a Farmer's Market and they put it in a paper bag...I used a paper bag.  I also used a button from the GARDEN VARIETY Collection.  A peach is a fruit...is that close?????

Here's a simple tutorial on the paper roses.

You will need:
Scissors
Glue Gun
a Square-ish section of your choice of paper

Step 1.  Cut your paper (see mine isn't perfectly square) into a spiral starting on the outside and working in.  Don't worry about it being perfect.  You can also used decorative edged scissors for a different take.


Step 2.  See how the paper spirals.  In the center you should leave a small, circular chunk of paper.  This will be the base of your flower and where you will glue it together.  Also cut the excess edge away.  See enlarged photo for wording and arrow. (Click on pic)


 Step 3. Start from the outer edge rolling the paper up into a somewhat tight spiral.  I wanted the peach to be the color that I saw so I flipped it over and started to roll in.  On my project I made one with the orange showing predominantly and one with the whitewash showing. 


Step 4.  Roll all the way to the end.  Until you get to that circular chunk of paper.


Step 5.  Now don't be scared, but let go of your rolled flower just a bit so that it can unravel some.  I press down on the center so it doesn't unravel too much.  This will give it more of a rose appearance.  I then put hot glue directly on the bottom part of the center.  A glob!   Stick it down on that chunky circle and press down from the top to ensure that it holds in place.  I use a LOW TEMP glue gun.  My fingers thank me for it:)

BTW... My largest flower uses a paper cut to these dimensions.... 4 x 3 3/4.  Why not 4x4?  Because my paper measured 4x 7 1/2.  I wasn't going to cut another:)  Try out different sizes and have fun!

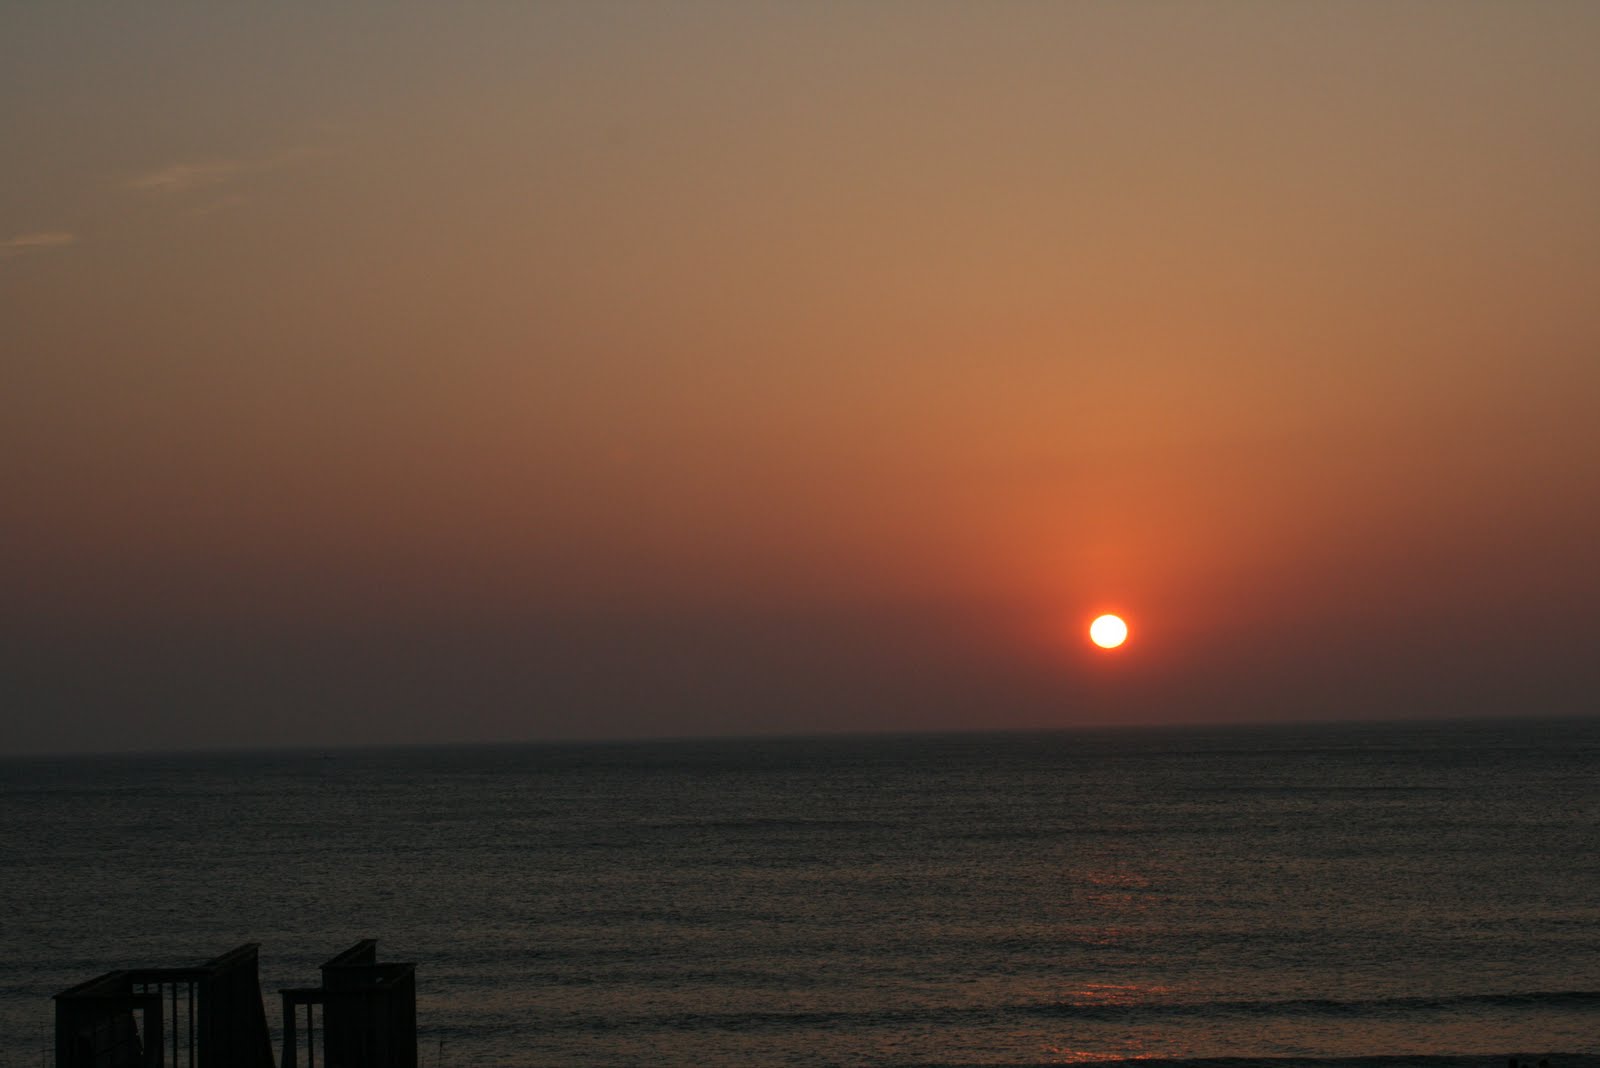
Heading out for a picnic today.  It's going to be HOT!

Enjoy!

Saturday, May 29, 2010

Yippee!!

I have TWO posts today that relate to DCRU!  Please make sure you read them both.  Thanks!

 I have had this card partially made for MONTHS now.  Paper set out...Image colored...nothing else.  This week the sketch challenge at A Little Crafty Place seemed perfect for it.  My sentiment is by Hero Arts.  I got the entire set for $5 on clearance.  Such a deal!  That cute little girl image is DAISY.  She's a Puddle Jumper.  You can find her over at DCRU here.  I also used the MME Quite Contrary Sampler pack.  I added a few dew drops and a PTI button with twine.  Super easy...especially when the coloring was all done months ago:)

I think this card will be perfect for my not so little girl.  She is finishing up her last year in Elementary(sniff sniff).  She is so excited for school to be done and to be a "Middle Schooler" next year.  I have a little something for her "graduation."  That's all for the rest of the day now. I will have a PWCO sketch for you tomorrow.  It is my last day as a PWCO design team member.  So stop back for that.

Heading out to finish up my garden before it gets too hot!
 Thanks for popping in again!

Tutorial Day At DCRU!

Good Morning !  I'm all set for a mostly relaxing weekend.  We have a few craft project to do for my son's school.  How about you?  Any plans for the long weekend?

Today I have a tutorial over at A Crafty Little Place.  This is the design team member's blog  for Die Cuts R Us.and I am so honored to have been asked to contribute.  DCRU has quickly become one of my favorite online stores.  Claudia is so sweet, she has super fast shipping, great communication AND always has a super sale on things.  You know how I love a deal.  In addition to all the things on sale this week, she is offering up FREE shipping to anyone who places an order of $50 or more.  I used the awesome April card kit for my cards today.  So go check out the tutorial for all the details.  It is a bit long, I think.  I like to" talk. ' What can I say?

Here is a sampling of the cards I made:


 I'm entering this into the Stamptacular Sunday Challenge ~ Pearls and Swirls and the JUGS Wild Card challenge~ dry embossing.  My embossing folder is swirled.


 This was posted the other day


 This is for the Moxie Fab Challenge, Fun with Fabric.  The flower and heart are from my daughter's curtains:)

Have a great one!

Friday, May 28, 2010

Long Day = Short Post

I have a really quick post that I didn't get up before I left this morning.  Today is the Studio313 Hot Spot Challenge.  The challenge this week is to pick from the Top 10 Albums of all time and use those as your inspiration.   Please check out the blog for all the details.


 I chose Pink Floyd The Wall as my inspiration.  I used the Hey Sweet Thang digital package by Studio 313.  You can find this under the "In the Kitchen" section. 

This also uses the sketch from Clean and Simple this week (correction~  LAST week:) and Castastic Wednesday's touch of green.  It's just a touch, but it's there:)

 That's it for the MOST boring post ever.   Sorry, I'm tired and after only eating a "graduation" cookie today, my tummy hurts:(  I'm also a whiner.  Wahhh!


Thursday, May 27, 2010

Combining Elegance and Comfort


I gotta say that I love the card I'm sharing today.  I never thought I would make a card, look at it and think, "Hey, this is totally ME!"  But I have.... 

I think this card completely represents my style and personality.  I love pretty things (who doesn't?), but I am all about comfort.  Being comfortable, having a comfortable home and hopefully making people feel comfortable around me.  I'm a "jeans" sort of gal who loves a bit of elegance thrown in the mix.  I have a passion for many things (red.)  I like to have fun ( polka dots are fun.)  My life is filled with wonkiness (ric rac.) I'm pretty touchy feely (fuzzy paper and embossing.)  And like the sentiment on the bottom, you can add some glitz on the outside of me, but inside I'm still comfortably worn and imperfect in so many ways.


I made this card with the Moxie Fab Fun with Fabric Challenge and over at FlourishesTimeless Tuesday #68 they have a challenge to make your own flower. I used the CPS sketch as my inspiration (with a slight alteration.) Stamp Something is to use 2 of something.  I used 2 colors....provided cream does not count....if it does then I used two papers:) Lastly, this is for the Pile It On challenge~ out of the box.  I think my card is pretty out of the box in all the elements.  After my analogy of the card and my personality you may just consider me "out of my mind."  Hopefully. that will count too:)

I will have more details on how I made this card Saturday.  It will be featured on my Guest Designer spot over at A Little Crafty Place( the Die Cuts R Us Design Team Blog.)

Hope you will stop back then for all the details on this card and a few more.

Happy Thursday!  Mine is FULL of kid stuff~ lunch on the bleachers, a play at school, ortho appts, a play again!  I'll be hopping for sure!

Wednesday, May 26, 2010

CAS Birthday

Hey Peeps!  Got a quick card today for the Cas-tastic Wednesday Challenge.  Ok, I cheated a bit because this was the CAS card I started for LAST week's Cas-tastic Challenge.  That was a one layer card and I just didn't like the way those clouds looked flat.  How fabulous that this same card could be used for this week's challenge to use a bit of green.  I used a set by PTI called, " Up,Up, Up and Away."  You know why I love this set????  Cause I had the same idea (for the most part) for a stamp set.  Oh I wish I knew how to make stamps:)  A pretty simple card and yet I still managed to color out of the lines...don't look too close, ok?

I will be back over the next few days with some cards to share.  I've been busy doing a tutorial.  I'll share more on that later.  Off to make dinner and head to a baseball game.....


Sunday, May 23, 2010

Duckie Congrats

This is a quick Sunday Post.  I have  many things going on today so I need to keep this post short.  Today it's another Sunday Sketch over at PWCO.  I used those sweet RAM Puddles of Fun and some leftover paper from a PWCO card kit.You can check out all the details on the PWCO blog today around 11am.

Thanks for popping by! 

Saturday, May 22, 2010

Shabby CAS

A really simple CAS card for the CAS challenge at Splitcoast this week.  The challenge is to make a CAS card that is Shabby Chic.  The Technique Challenge on Splitcoast is to "frame" an image or sentiment...anything really on your card.  I used one of the Label Nesties for that.  I am in love with this October Afternoon paper.  The stamp set coordinates with this paper and  is from OA as well.
I used the same set on my card the other day.  I just did some very basic, sloppy paper pleating and added a ribbon and REALLY old lace trim that I had in my stash.  The base of the card is embossed and then distressed .  That's it!   I really enjoy doing a CAS card now.  Makes life simple.  Have a great weekend.  See you back here tomorrow for a Sunday Sketch:)

Toodles!

Wednesday, May 19, 2010

A Blue Doily for You


I 've really wanted to make something with this paper by Graphic 45 for a few weeks now.  The sketch at 2S4Y  and A Crafty Little Place were both somewhat similar in design this week so I combined them, added  my twist and came up with this card. I also really wanted to ink up my new doily stamp from the  October Afternoon Thrift Shop stamp set.  I keep seeing doily type stuff all over blogland and really love the look and feel of vintage.  It was a no brainer that these papers and this stamp would work well together.  I paired it with some crinkle ribbon and PTI vintage buttons.  Voila!

Did you notice that  punched vellum along the bottom.? My new favorite product is Scor Tape.  This is THE best stuff for ribbons, templates, glitter, etc. I used that to adhere the vellum and you could see it so I put another strip on the top and added glitter.  It ties in with the bling on the doily I think.  I also made this for the Allsorts Challenge Blog Birthday Challenge.  I know it doesn't say anything about birthdays.  You just have to trust me on this.  It is for a very special birthday person.  I haven't finished the inside yet.  Working on that today. Since I'm celebrating someone's birthday this fits the Stamp Something Challenge.

I have a few links I wanted to share with you.  Not enough to for a whole post on "For the Love of Links and Other Thinks."   Just a few.  I recently subscribed to a few new blogs that aren't about cards.  Yes, it's true!:)  There are blogs on things other than cards.  Can you imagine???

The first one is on remodeling and she has a post about creating a section for gift wrap out of curtain rods and a frame.  THIS would really rock as a place to hold all your ribbon.  See how it all comes back to cardmaking???  She also shared THIS recipe for homemade CHOCOLATE:) cake.  I haven't tried it myself yet.  Oh, but I will!

THIS ONE is my favorite link.  I saw this yesterday and I immediately had to go make this project with the idea.....

I decided to enter this into the Moxie Fab challenge Fun With Fabric.  More for awareness and sharing than because I think it's "award winning."  I feel like I need to spread the word on plastic bag fabric:)


Yes, my sewing still stinks.  Do you know what this is????  It's a plastic bag that was ironed and fused to make a little coin purse for my daughter.  When I read the statistic that we use around  one million bags PER MINUTE around the globe I actually felt sick.  I try to use my own canvas bags, but some days I forget to take them in or I'm with my husband ( who needs to put some in his car:)  So I do have a few plastic ones floating around.  Not many though.

This is were I have to share a big pet peeve of mine..... when people put a BAG of apples into a bag.  Then they don't add anything else because it's already too heavy for the flimsy grocery store plastic bag.  Um....it's already in a bag.  The same goes for potatoes, bread, etc.... Such a waste.  I just have to share that because I don't think people realize what they are doing.  Ok...feels good to get that off my chest.


  This is the closure of the little purse.... (clearanced velcro:)


I used the large scalloped circle nestabilites to created the flower.  This is a "Justice" bag.  If you have a young girl you probably know that brand.  I have a few tips from the video on how to make this plastic paper.  She used copy paper and recommended turning the bag inside out so the ink wouldn't bleed through.  I did that for the base of the purse except that my bag stuck to the paper.  So I used PARCHMENT paper with much success.  In fact I was able to do a section of the bag with the ink on the outside.  I like that better.  Especially if you have a pretty bag.  No sticking or bleeding through.  This project just makes me giddy with delight.  My kids loved it!  I'm going to make one for my son too.  The great thing....it's waterproof!  Wouldn't it be awesome to "quilt" a whole bag from this...AHHH recycling at it's best!  So go watch the video.  It's funny because I watched it with no sound and it reminded me a a silent movie.  She doesn't talk in it.  Would have been really funny if it were in black and white and she sped up some of the footage.

WOW that was long!  Thanks for hanging in there.  Off to craft and clean today.
Have a goodie!

Monday, May 17, 2010

An Inspiring Story about a Boy, A Man and A Family

A am so happy to share this card today that I made for a very special friend.  She was a coworker of mine and from that sprouted a very special friendship.  She introduced me to the miracle of adoption.  That the child you adopt may not be from your body, but they are meant for you. A true gift from GOD.  I had the blessing of watching her first adopted child when I lived in Michigan and I can tell you with all my heart that that little girl was like our third child.  She was an extension of our own family.   I miss her.    I recently found out that they are adopting their third child from China.  They are there getting him right now.  It's so exciting and I have been following their "Journey to Isaac" blog posts.  I made this card for them as a "Welcome" to the joys of having a boy (after a house full of pink and princesses).

Make sure you read to the end of this post for a story that may just give you goosebumps or more...


Here's the inside:

(click on the picture to enlarge)

I made this for several  challenges this week.  I love the fact that Isaac is coming from China into the USA so I could use Red, White and Blue.  This isn't your typical "Welcome Baby" card.  Isaac is almost one so I thought this image from the Pure Innocence Collection was a bit more fitting than a baby.  He doesn't really look Asian though.  I need more Copic colors:)  I wanted to point out that I colored the bottom layer of that star with Copics.  That way I was sure it matched my project.  Red card stock seemed too harsh.  Also, the layer underneath is a Labels 11 nestie and I had to cut it in half to have it span the length I needed.  One more thing.  My ribbon was folded in half and sewn because it was just toooooo wide for my liking.
I used Jen's SFYTT.  This also fits the challenge at JUGS and The Shabby Tea Room to use Red, White, Blue and optional Kraft.  Over at Stamptacular Sunday Challenge you were to include a tree.  CCEE Stampers is Nursery Rhymes...this is Little Boy Blue:)  The Crazy Challenge is 'something NEW.'


So onto the story...
I always tell my kids that each person is put on this Earth for a reason.  That no one is better than anyone else.  Each person has their own gift to share on this world.  That if you take the time to look for it you can learn something from everyone.  Sometimes the lesson is that you don't ever want to BE like that person.  Still, it's something.

While reading my friend's blog posts about being in China and their travels she shared a story about the man that is assigned to their family that will eventually bring them to their new son.  His name is George and he has been taking them all around China sightseeing, translating, being their guide, etc...

HERE IS THE STORY OF GEORGE (as taken from the blog post)

Want to tell you George’s story too.  His mother had her tubes tied after 5 children (before the 1 child policy was mandatory).  Six years later she started feeling sick, doctors diagnosed her with cancer, and she had two weeks of cancer drugs. Then, the old woman sharing her hospital room told her she did not think she had cancer, but was pregnant.  Sure enough, it was true!  Doctors said the baby would not be “normal” and gave her abortion pills…two rounds.  When these were unsuccessful his mother gave up and three months later gave birth to George. Divine intervention, George called it destiny, eventually led to him helping abandoned children become part of their very own families…God knows we appreciate the irony!

 I thought this story was a perfect example of the fact that we are all important on this Earth.  What an amazing person George was to be able to see that he was a gift to this world and to make sure that other children felt that they are gifts as well.  I feel so lucky to know this family and be inspired by their unselfish acts.  I hope this story inspires you too.  The message isn't about adoption or abortion; it's about realizing that we all have something in us to give...a reason....a purpose.  In a world where everyone is trying to outdo everyone else, trying to be "The Best", thinking they are more important.....  Truth is, we all come from the same place and we all end up in the same place.  We all need each other to do the " in between."


I hope that you share this story.  I think it's full of , well, inspiration!  ( I need another word that means inspire.  I sure used it enough in this story;)
Have a great Monday!


Sunday, May 16, 2010

Another Post

I was checking out some challenges this morning and realized that one I REALLY wanted to do ended today. I LOVED the inspiration pillow for the Color Q challenge.  I think I may have to remodel my front room now using that pillow:)

Anyway, I decided to sit right down and create a quick card.  I made this up in about a half an hour.  That's pretty fabulous for me.  I think I needed a more elegant flower, but that would have required time I just don't have.   I was able to grab several strips of scrap paper and use several of my lovely ribbons and trim.  I used the sketch provided my EBTKS challenge.  This is a birthday card so it fits in with Allsort's birthday challenge.    The only stamping I did was the sentiment.  Even the flower is cut out of designer paper.

Stamps: Birthday Balloon Joline MFT
Ink: versafine black
Paper: Spring Moss, Text cream, TPS, digital paper
Other: Trim, CI dotted black ribbon, Webster's Pages Trim, dimensionals, pearls, embossing folder

Rain or Shine

Today it's time for the PWCO Sunday Sketch.  I had to add my own little twist to the sketch.  I just kept thinking about rainbows and the Rachelle Ann Miller Puddles of Fun was the perfect stamp to use.  This was a really quick card except for those Stickles.  WOW!  I swear I waited an hour for them to dry and then I just decided to take the picture anyways:)  For more details on this sketch and my card please check out the PWCO blog.

We've got a busy Sunday ahead.  I hope  you are having fabulous weather where you are.  Thanks for popping in!


Stamps: Curvy Verses, RAM Puddles of Fun
Ink: memento black
Paper: Bazzill, Prism, Perfect Plum
Other: 1 1/4" circle punch, dimensionals, stickles, glitter
Copics

Saturday, May 15, 2010

You're So Sweet in a Vintage Sort of Way

Wow!  It's a beautiful Saturday morning.  The sun is shining and my house is quiet. I know soon enough the kids will be up and my peaceful morning will become hectic with all the activity.  I love mornings.  It's my quiet, crafting, alone time with my friend, Mr Coffee:)  Today I wanted to share one of those 5 cards I've been working on.  This is actually the one that I got all done  realized I had made it upside down.  Luckily I was able to just switch the top panel around to fix it. Phew!

I made this using some NEW Digital Paper by Shawne called, " Sweet Thang Vintage. You can find it over at Studio 313 Exclusive Creations under the Earthy section of the digital paper.  I am in love with this stuff.
I used Mercy's Tuesday sketch (kind of) and added a chipboard base in the center that was painted with TH distress paint and then distressed even more with TH antique linen ink.  The cherries are from the Just Jawing set.  I decided to add some Diamond Glaze  and boy did it brighten them up.  Not really the look I was going for, but that's ok.  My sentiment is from Verve's Thankful Accents set which is another of my favorite sets. Because I used chipboard I am submitting this to The Shabby Tea Room again. 

I made something else with this awesome paper.  It has quite a few mistakes so don't look too hard.  This was my gift to my sister for her wedding.  Well,  part of my gift anyway.  My sister doesn't cook and her husband came with a "ready made" family.  So now she is trying to learn how to make meals for more than one person:)  Hopefully my gift will help.


I decided to share many of the recipes I have collected over the years from family and friends.  Most of these are very quick, easy meals that I use myself.  I love the idea of passing down family recipes.  It's like sharing a part of you.  I can't help but think of those people as I make their specialties.  I wrote everything out by hand.  There is something even more special about looking at a person's handwriting, especially when they are gone.  I have several of my Bushia's recipes (grandma in Polish) and I love to see her handwriting.  I really feelslike I still have a part of her with me as I cook.  So, I photocopied those Bushia recipes for my sister.  I hope she enjoys that as much as I do.  One lesson I learned while making this was that Alene's Ok to Wash It dries very sticky.  I wouldn't use it again for trim.  I'm afraid of how much gunk it will collect around the trim over the years.  The true gift is inside.  Do you write out your recipes still or do you print them off on a computer?  I hope if you pass them down to someone you write them out.  Years down the road people will look at your handwriting and think of you more clearly I'm sure.  BTW, the front of the recipe box says, "Good Eats" not "Good EARS as my husband thought:)

Thought I would share a few pictures of our day at the beach while in The Outer Banks.

( click on picture for a closer view)

This is the wedding day....starting with a beautiful sunrise


I don't have any pictures of the ceremony because I was busy holding my sister's veil down:)  It was a VERY warm day with gusty winds  and so pretty on the beach.  We wore shoes as we walked through the sand and got a GREAT exfoliation treatment.  Beach weddings should be barefoot I believe.  However, my feet felt pretty smooth from having sand in my shoe.

Here's a collage of the day...


We love to party it up.  This family LOVES to dance.  I have so many more pictures, but I won't bore you with them all.

So what happens after a day of partying with the Smoker family???


We are a wild bunch and we're sure to tire you out.

It was a really fun time and we are going to end this post on a happy note.

Thanks for hanging in there through family pics.  I have to say that the Canary yellow dress ended up looking OK on me.  My wild hair color tamed down before the big day.  A big thanks to VINEGAR.  It's a natural stripper you know.  I washed my hair several times with it to get that purplish red tint out.  It seemed to work!  Yeah!

It was really humid, but thanks to LOTS of hair product and my wonderful beautician Aunt  the frizzies stayed away.  Not Brillo pad in sight.  It was supposed to Thunderstorm that day, but NOPE.  So happy about that for my sister.  All that fretting I did and it all worked out ok in the end.  It usually does.  You just have to have faith.

Have a great Saturday.  I'll be back tomorrow with a PWCO sketch for you all to try!

Friday, May 14, 2010

BIG AND BOLD

I can't believe it's already Friday.  This time last week I was sitting on the beach watching the waves come crashing in as my kid's ran from that freezing ocean water. Brrr was it cold.  I remember as a kid not caring a bit.  Not now.  I stuck one toe in and said, "Whoa!  I'm heading back to my towel and drink:)

I wanted to thank everyone for the warm comments on my mood yesterday.  I am feeling better today and realize that my blog is supposed to be a happy place.  I reread my post yesterday and thought..."What a crab.  Who wants to read that?"  So today I have a cheery card to share instead of "Woe is me" stuff.


This just screams fun doesn't it?  Today is my momma's birthday.  Happy Birthday Mom!  Love you!  This is not for her though.  I made this for the challenge over at Studio 313 Hot Spot. 

The challenge this week focuses on using psychedelic prints in the home.  That's what appears to be hot in home furnishings at the moment.  So how can you translate that to your cards?  Think Bold, Bright colors.  I used the digital paper by Shawne called, Carnival Dots and Spots and Carnival Sloppy Stripe.  I created my pinwheels by printing on each side of my presentation paper.  Instant double sided DP!  Pinwheels are so easy to make.  Simply cut a square of double sided paper.  (mine are 2 3/4" and 3 1/2")  Cut up from each corner into the middle with scissors ( but not all the way or you will cut it apart).  Take one corner and fold it up to meet the center.  I then put a bit of glue to hold it.  Do this on all four corners and then pierce a hole in the center.  Attach with a brad.  You can attach this to a stick if you want it to move.  Mine are stationary.  If you need a picture as reference check THIS out.

I really hope you all can join us for this fun challenge.  You don't have to use Studio 313 Exclusive Creations, but if you've got them why not use them.  If you don't have any this is a great way to win some.  The winner of this challenge will receive $25 worth of free digi's.  That's a great deal!

I am also entering this into a few other challenges.

CCEE Stampers- nursery rhymes....The Wheels on the Bus Go Round and Round. Ok, this may not be a nursery rhyme, but it's a song I sang at nursery school.  My card is the Pinwheels on the Card Go Round and Round....Oh Wait...no they don't.  Hmmmm....I may be stretching here.  It's still fun.  I'm trying to be positive:D  Indulge me.
CAS-tastic Wednesday- A card with CIRCLES!
CAS challenge on Splitcoast using a sketch.  I modified the sketch a bit in true "Nikki" fashion:)

But WAIT!  There's more.....

This is the first card I made and wasn't really thrilled with it.  What I have come to realize is that many times when I post a card I don't care for many others do like it.  Then cards I really like won't get as many comments.  The lesson ( other than the fact that my taste apparently STINKS) is that we all have different views and this is a place of sharing...good and bad.  Having said that.  Tomorrow I will have another post and I think I may share some of the struggles I have had this week.  You never know how it may affect someone else.  I promise it won't be so crabby though.  Oh, I almost forgot...the card!


See you tomorrow!(Said with a SMILE)

Thursday, May 13, 2010

It's a Lonely Love Story

Hello my dear blogging friends.  It's been a rough week.  I really haven't felt in the mood for creativity.  I have five cards started, sitting on my table,  just staring at me while I stare right back.  This morning I was committed to finishing at least one.  So I made this vintage card inspired by several challenges.
The Shabby Tea Room~ use chipboard
The Playdate Cafe Colors
(missed the deadline)
Card Patterns~ Sketch


As I was editing my picture I started to think about how this really isn't a "love story."  There is only one bird.  Maybe it's a card about loving yourself.  Let's go with that shall we?  I may make another bird and move them together.  I just didn't have it in me this am.  Besides, it would be like 4 more days before I could post it and then it wouldn't fit any of the challenges.  I think this may sum up how my week is going.  The other card, which I will share tomorrow, I adhered upside down.  Another good analogy of how I'm feeling this week:)

Because I'm in a foul mood, no pun intended, I will keep this post short.  I'm heading out to spend the day with my hubby.  I'm sure that will help and I'll be much better by tomorrow.

I wanted to share that my chipboard was painted with Distress Paint and then I dumped glitter on while the paint was still wet.  That gives it a bit of a different look.  Also, my chipboard bird was painted with Smooch and then aged with Fresh Snow and Sahara Sand ink.  Sahara Sand is a great ink to use for a variation on giving a project an antiqued look. IMO.


What's In It?
Stamps: Bo Bunny Cherished
Ink: Sahara Sand, versafine black
Paper: MME Quite Contrary, TPS texted DP, white
Other: Maya Road chipboard, wrinkled ribbon, distress paint, lace, glitter, smooch, button, twine, black pearls, sewing machine.


Monday, May 10, 2010

Winner Time!

Hey y'all!  I'm back from North Carolina.  I remembered to draw the winner today.  I don't have anything to post yet, but should tomorrow.  So in the meantime....

The  winner of my PWCO blog candy is  #33 ( random.org).....


Laurie said... These are sooo adorable!

 Congrats Laurie.  Thanks for playing.  I will be in touch.