Quote of the Week

I've learned that people will forget what you said, people will forget what you did, but people will never forget how you made them feel.

Maya Angelou

Wednesday, October 29, 2008

Kristina Werner's Color Combo


I couldn't resist participating in this challenge. I have a real thing for purses....like most women. But I really do a great job of just looking and longing for instead of buying. Mainly because I am very cheap. I loved the look of this tangerine purse. I used to hate the color orange. But, I find myself liking it more and more all the time. October is definitely the month to embrace this color wholeheartedly.


BTW, HAPPY HALLOWEEN! We had the class party today and it went off great. The kid's got slightly spooked by my hairy toe story. Love spooking them a little but I definitely am not into really scary stuff. My kid's made me go through the "haunted trail" that is at one of the houses where we trick or treat. Even in the light of day it made me shiver. Maybe it's just me, but the sight of a wicked looking clown holding a long bladed knife kinda gives me chills.
Enough babbling and onto the pictures....


This card was done using a retired SU set called Mixed Bouquet. I also used a current set called Short and Sweet that you can view here (When you order through me directly you will always receive the "discounted" price). I randomly cut a curved piece of white cardstock and then stamped on it with the Linen background stamp in going gray after stamping off several times. This gives it a little bit of texture. All images were embossed in black and then watercolored in. The teeny flowers are also embossed but were cut out seperately and then glued on. I'm really loving that taffeta ribbon. This one is Riding Hood Red. I used the small and larger oval punches for layering. I feel like I need to paper pierce everything these days. Helps with the stress ya know. Sticking a needle through something can really be great therapy...well depending what you are sticking I guess.
The smudge on the bottom is not added for any particular reason. I just happened to have cleaned up the "bowl of mushy goo" from the party and must not have gotten all the oil off my hands before touching my finished card. UGH! This is my life. A stain here, a stain there, a stain everywhere. Speaking of mushy goo...here are my kids playing in it after school.

Now totally off the subject of stamping I am including a few more pics from Disney for family.


Disney has a way of making you act a little goofy...no pun intended. Oh yeah, and a little fat! We ate desert like twice a day. As you can see, it was good to the last drop:)

BACK FROM DISNEY!


We arrived back from Disney on Tuesday evening. It was a FABULOUS vacation. I met my husband 14 and a half years ago. We celebrated our honeymoon at Disney almost 11 years ago. My how time has changed since we last visited. It was fun to reminisce about what has happened in our lives since then. It was so great to be able to share an experience that he and I had shared at the start of our life together with our kids 11 years later.

Since we have been together I have wanted to dress up as Wilm
a and Fred Flintstone. It is a 14 year dream come true! Disney really is a "Magical Place". We attended the Halloween Party at Magic Kingdom on Sunday evening. My daughter dressed up as Pebbles but my son decided to be a clone trooper from Star Wars. It was such a great time. My favorite of the whole trip. My husband even had some of the girls in the parade flirt with "Fred Flintstone". He decided maybe it was worth dressing up:)

We have so many memories from this trip. To many to really share. It truly was a once in a lifetime event for us. My kids can't wait to go back. And while we may, it will never be like this time. Them seeing it for the first time, being with my husband's whole family and staying for a full 10
days was truly a magical experience. I hope to share some more photos over the next few days. But here are a few for now...


I know today is Work It Girl Wednesday...and I'm workin' it...working on getting caught up that is. I will resume my normal posting by the weekend. But for now my family needs my attention as Halloween is fast approaching. I hope you all have a magical day!

Thursday, October 16, 2008

KRISTINA'S COLOR CHALLENGE

Please check out my previous post as it will be completely passed over because I posted it so late at night.

And now onto the color challenge. I made this card for my husband's friend's daughter...did ya get that? Anyways, she is going to be two. This is a pop up card that I hope to do a tutorial on when I return. Love these cards. The only problem is they can be a bit bulky. But I bet she'll get a kick out of it.


Excuse my finger...the card wouldn't stay closed all the way:)
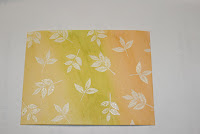
The recipe:
Stamps: Wild About You, Happy Everything, B is for birthday
Ink and Paper are the colors listed above.
Accessories: Coluzzle cutter, Circle punches 1" and 1 1/4"
Cuttlebug, ribbon and googlie eyes.

Do you love it? The inside look more like lollipops than the balloons I envisioned but it works ok. They are adhered onto jewelry posts. I couldn't find my wire. So I made due. I will post more details on how to do this at a later date. It is much too late. I must get to bed.

WORK IT GIRL WEDNESDAY(very late)


I started my post early this morning with an old card I had made. But, I was able to stamp a bit tonight. So, I do have a new card. Yippee! I needed some quiet, alone time to be creative and de-stress. It has been a hectic couple of days around here. So, I have to share the story behind the inspiration for this card...

Yesterday, I had to do my packing and some volunteer work at the school. I had a bit of a frazzled day as I forgot my daughter's lunch and remembered AT lunch time. I also had to take her to 2 different doctors appts that were very close together as far as time but in different cities. So after racing from the Ped's office (she has poison ivy BTW) to the orthodontist I was SO ready to read a magazine. Well, I had my hands full with my bag of stuff that I brought to work on, my purse and 2 of their magazines. I barely had time to look at one and she was all done. I got to talking to the Dr. about our trip....then proceeded to make her next appt while trying to round up my son . We quickly got into the car to head home for homework, dinner and more packing. When we were almost home I happened to glance down on the passenger side floor and realized that I had BOTH of the orthodontist's magazines STARING up at me. I was like "Holy Crap! I just stole their magazines!" My son proceeded with "Mom, you're a crook!" And my daughter was all stressed out because she thought I was going to go to jail.
Now, if my ortho wasn't a half hour away I would have turned around and taken them back. But I was very pressed for time so I assured my kids that I would take them back at our next appt or if we are in the neighborhood anytime sooner. However, they will have the next month's issues by then I'm sure. But tell me WHAT doctor's office of any kind doesn't carry the oldest issues of a magazine known to man! I worked in a dental office...I know how long those things hang around. So, I promise I will return them. What does this have to do with my card......well, the front of one magazine had a BEAUTIFUL fall flower arrangement.

So, here are the details:


This card was done on basic black cardstock and stamped with the SANDED background stamp in white craft ink. I LOVE this background stamp. I then die cut the Top Note twice. Once in Wild Wasabi and then in white. Stamped with an image from the retired set, Friends are Like Flowers, and colored with markers. I used only orange, more mustard, wild wasabi, going gray and summer sun. The ribbons at the top are 3 different shades and just tied in a basic knot. I adhered it using crystal effects. As always, the cards look better in real life. Well, I hope you enjoy and may I close by saying...

"I AM NOT A CROOK!" ( think presidential...hehehe)

Tuesday, October 14, 2008

VACATION,PACKING, CRAFTING...OH MY!


I'm sorry I haven't posted in a few days. It has been very busy around here as we get ready for our trip to Disney. I spent several hours in the ER on Sunday with my daughter. No "real" emergency. We thought maybe she had bed bug bites, which thank goodness they ARE NOT! Then it would have been a real emergency. She just is covered with insect bites. She must be really sweet because those bugs really loved on her. Speaking of my beautiful daughter, look what she made me at her friends bday party. She put every favorite color of the family on it. I have been drinking my morning cuppa Joe out of it. I just love it. I have a truly beautiful, giving family. I was blessed twice this week with gifts. My husband surprised me with an early anniversary/Christmas gift...a NEW LAPTOP. How wonderful is he?! The even more surprising thing is that we "don't do gifts" for each other. He is really the best!

So what have I been up to all weekend besides packing? Well, I'm making halloween costumes for one. And look what else...


These cute tshirts are for my kids and niece and nephews for Halloween. I got the idea out of the Family Fun Magazine


These were really fun to make. I wish I had done one for myself. I still may do that.

The next project I have been working on is for my son's class Halloween party. I am the room parent. So I am in charge of planning the party. I love doing this. However, I have had to plan early because we will be gone until just before Halloween. I am going to tell a somewhat spooky story that was told to me in Elementary school. I looked forward to it each year. I have changed it a bit to make it my own. Bu
t I need a prop for it. The next picture is not for the meek...I don't think it is bad but some may be grossed out. Especially if you don't like feet.

What is it you ask? Well, it's a HAIRY TOE obviously. The title of my story is called "Who's Got
My Hairy Toe"
I LOVE THIS STORY. So fun! I told it to my daughter's class last year and they liked it. I had to make a new toe though because some people said my "old toe" resembled something else...that is not appropriate to write on this blog...you get the picture...well, I hope not mentally...ok....moving on.

The last thing I wanted to show you is from a challenge issued by Splitcoaststampers. This is a fabulous website with tons of inspiration. The challenge was to ma
ke a pizza box. I will be making these for all the teachers who didn't get my previous halloween treat. My kids wanted to make sure everyone of their teachers got a treat. I couldn't afford to do like 7 more of the spider vases. So they will get these cute boxes...not anytime soon mind you. Hello, I'm leaving in 2 days and my calendar is full of volunteer type things....ranting and raving done now. So here is the box. I have an idea of what I'd like to put in it but that requires some time too. This was my idea for a Halloween treats class that just "ain't" gonna happen. Bummer. But now for your viewing pleasure.....


You can go here to download the template and directions for the actual pizza box. I used the following stamp sets:Tasty Sweet, Halloween Frights (holiday mini in the top right of my blog) Paper: Basic Black, Ghostly Greetings designer paper, old olive and gray textured by DCWV.

Here is what I did. I made the actual box out of the black cardstock and used a sticky strip for ultra hold at the edges. I then scalloped edge punched the gray band that went around the edge. I cut a very slim strip of the reverse si
de of DP from the top portion and stamped the YUM YUM in black. The top DP has faux stitching around the edges. The little centerpiece is a piece of chipboard from the SU seasonal collection. I painted it white first. I find this allows my ink to show up better...but honestly I had other plans for it so it just happened to be white already. I then covered with pumpkin pie craft ink and embossed it with clear embossing powder. A small square of Old Olive lines the inside and then the cat is stamped in black craft and embossed with iridescent ice EP. I punched out a small orange circle from scrap and used dimensionals to pop the cat up on top. This really was pretty quick to put together. Give it a try. I guarantee it will make someone smile...even if it is empty:) Hope you all have a great one. I hope to post one more time before I leave for DISNEYWORLD...WHOOHOO
NIKKI I accidentally erased my signature:(

Friday, October 10, 2008

Kristina Werner's Color Combo and Loving a Frog

Today's color combo was rough for me. I made two different cards and don't really like either one. But I am sure the recipients of these will just be happy to get something made from the heart.

Isn't that frog cute on top of all those quilts? I LOVE frogs...not in real life mind you...but I just love their big eyes. And they always seem to have this great big grin. Why do you think that is....flies can't taste THAT great. There is someone else in my family that loves frogs too. My brother seems to have an uncanny affection for them...can you tell?

This is before he had a girlfriend. His thought was that if it worked in fairy tales maybe it would work for him. He is totally going to kill me for this. But it is too cute. My brother is very funny and a great person. Love him to death.


Now onto my two cards....

This card was done on watercolor paper. The set is called Upsy Daisy...really like this set. I used my aquapainter to watercolor the sky using ballet blue. The image was colored directly onto the stamp . Then I misted lightly with water and stamped. I used my new Red Riding Hood taffeta ribbon with a filigree brad and used a blue rhinestone brad for the center. I really love the taffeta ribbon. It is just so soft to look at and feel.


I could not get a good picture for this card...so I apologize. I used the a hostess set called Live Like You Mean It. The background was three scrap pieces layered and adhered then I ran it through my cuttlebug. I sponged on some white craft ink to tone it down a bit. Again with the taffeta ribbon and yellow brads at the corners.
Well thanks for looking today. I have a lot of crafting that I am doing over the weekend. It is not stamping related necessarily but I am hoping to show you some of the fun projects I have in store.
Yesterday was the start of our official count down to Disney. Yes! We are going to Disney World next week. So exciting! So, I have some projects to work on for that and for when we get home...as it will almost be HALLOWEEN! Love Halloween. So I hope to post more on Sunday. Have a great weekend. It is just gorgeous here in southern Ohio.

Thursday, October 9, 2008

WORK IT GIRL WEDNESDAY...but more like Thursday:)

This is my inspiration for my own challenge today! I find that I often need something to give a little oomph to my creative mind and get it going. This image is from Martha Stewart. Here are the 2, yes TWO, cards that I came up with:


The first card measures 5 1/4 square. It uses the sanded background in white craft ink on basic black. The new riding hood red cardstock is sewed very wonkily (is this a word?) for that very reason. I don't sew in a straight line too well so let's make it obvious shall we? I used a scrap piece of white taffeta ribbon ( love using scraps) and then some self dyed flowers from the Pretties kit in Red Riding Hood red. Next I embossed tiny dots with black EP on the black cardstock centers. They just needed something so I added a page pebble. The sentiment in the corner is from the Hostess set called BEST YET. I LOVE SENTIMENTS!


This next card reminds me of a MACY's bag. I stamped in versamark on the black with the set Tres Chic. You can't see this in the photo. Then did some paper piercing around the edge. You can't really see this either. The ribbon is from the mini catalog and is Riding Hood Red 1 1/4" stripe. SOOO pretty for the holidays. I used a 5 petal punch ( twice) and then adhered it with the new filigree brads and a rhinestone to top it off. The sentiment was a clearanced item...don't remember who it is by...sorry.


I now have one more card to show. This one uses the aquapainter and some Designer paper. I am very into fall colors usually and most definitely now that it is fall.


Quickly I will showcase the recipe...
This set is called Merci and is retired. Imagine using a set called Merci and then making it into a HAPPY BIRTHDAY card. Weird. The sentiment is also from a retired birthday set that I waited FOREVER to get...and then they retired it.UGH!
Ink: Tango Tangerine, More Mustard, Kiwi Kiss,
Paper: Bella DP, More Mustard, White
Accessories: 1/2" circle punch, Coluzzle Cutting System, Scalloped Edge Punch, Joann's clearanced orange twill, oval punch.

ENJOY and MERCI! for stopping by....

Wednesday, October 8, 2008

Question of the Week


Today was supposed to be my Work It Girl Wednesday post but I am swapping days and doing the question of the week instead. I have been gone most of the day or working on homework with kids so I didn't have time to take pics of my project. I will do that tomorrow. So the question of the week has to do with my post from yesterday, kinda.... Remember the candy corn and peanut mix? Well, the great thing about this is that you have the fabulous taste of salty and sweet. Oh so good.
So what I want to know is if you are mainly a sweet or salty kind of person?
It's such a silly question I know but I needed some silliness today. We attended the funeral of the 25 year old mother and her baby today. Very sad. So silliness in high doses needed around here.
I am a complete sweets person. I have a friend who does not like chocolate ( gasps heard round the world) but I like her anyway. She totally loses all willpower when it comes to chips. I could really care less for chips unless they are Tostito with lime and a margarita but that is another story. So what are you? The ladies at school really liked their gifts today. I am happy to give a little something to these women who do so much. They deserve it!

Tuesday, October 7, 2008

THE BAD, THE UGLY and THE GOOD

...Or, Making Lemons Out of Lemondade, Or When a Deal is NOT a Deal.


Any of these titles would be appropriate for today's post. Here is the story:


A few weeks back I was working a lot subbing at the school. So, normally I get to do all my shopping during the time the kids are in school. However, that was not working out for me. I had to get in town to get some errands done and the only time I could fit it in was after school WITH the kids....Mistake #1


I was also very hungry because I hadn't had time for lunch that day....Mistake #2.


For those who do not know THESE are the first 2 rules of WHAT NOT TO DO WHEN SHOPPING! (THE BAD)

So as we are at Target my daughter spots the candy corn. She loves candy corn and pleaded with me to buy some for home. Well, because I was hungry and they where on sale, I bought 3 bags. These 3 bags have been haunting me for weeks. I really do not possess willpower. This is why we usually do not have this kind of stuff in the home. So, I decided to spread the girth...I mean wealth and make a project to give to my children's teachers for Halloween.

If you have never had Candy Corn mixed with peanuts you are missing out on a treat (unless of course you are allergic to nuts...then not so much). So Below is the picture of what I made using that adorable little spider (THE UGLY but really very cute) from Decor Elements. This is still available for purchase til the end of Oct. These Decor Elements are so easy to apply. I got the vases from Goodwill and sterilized them in the dishwasher first. Then rubbed on the spider and wrapped some orange satin ribbon around the neck. I decorated skewers with stamped letters on the scalloped punched Tango Tangerine cardstock. Hopefully you can see that it says "Boo to U" . I wanted to stick something inside to keep little fingers from reaching in to the teacher's treats.

THE GOOD


I really hope that I will not need to go and buy more candy corn. The morale of the story is this...Just because it says 3 for $5 DOES NOT MEAN YOU MUST BY THREE....oh....and never go shopping hungry, with kids.

Hope you all have a fabulous day


Sunday, October 5, 2008

CHOCOLATTA GREETINGS

So, I click on an article yesterday about the 7 best anti-aging foods for you and what was at the top of the list......CHOCOLATE! YES! Read on...

Chocolate

The Kuna people of the San Blas islands, off the coast of Panama, have a rate of heart disease that is nine times less than that of mainland Panamanians. The reason? The Kuna drink plenty of a beverage made with generous proportions of cocoa, which is unusually rich in flavanols that help preserve the healthy function of blood vessels. Maintaining youthful blood vessels lowers risk of high blood pressure, type 2 diabetes, kidney disease and dementia.
Get sweet satisfaction in seconds with
delicious chocolate recipes, such as Chocolate & Nut Butter Bites (which include two of the 7 anti-aging super foods!):
Chocolate & Nut Butter Bites
8 1/4-ounce squares of bittersweet chocolate4 teaspoons almond, cashew or pistachio butter
Top each chocolate square with 1/2 teaspoon nut butter of your choice (almond, cashew, pistachio). Two sandwiches make one serving.
Per serving: 79 calories; 6 g fat (2 g sat, 1 g mono); 0 mg cholesterol; 9 g carbohydrate; 1 g protein; 1 g fiber; 12 mg sodium; 20 mg potassium. What you get: Magnesium, copper, chromium. 1/2 Carbohydrate Serving.


Ok, so I'm thinking that a Reese's Cup would qualify, right?! I really don't like to cook and the lazy in me is thinking Reese's is an acceptable substitute. It is my favorite candy bar of all time and God has answered my prayers. I mean, WOW, it will now help me from aging?!! What a fabulous day!


Yesterday I was a crafting fool. I am going to quickly post a few of the projects I worked on. The following are a few things I made for my daughter's friend's birthday party. Which is where she is right now. The first is her bday card....


She is a cheerleader, so the big yellow things are supposed to be pom poms.


I covered a pad of paper with some patterned paper. The box is made with some chipboard coasters. There is also an RSVP pen with the same paper inside to coordinate. I now have to make this for my daughter. She wanted to keep it :) Today is my last day to get to do a bit of stamping. My house is in serious need of attention. Very neglected lately. I hope to be able to post again tomorrow but we shall see how the day unfolds. I will be working on some Halloween things and showing you in the future. Stay tuned and have a beautiful Sunday!

Saturday, October 4, 2008

Happy WORLD CARD MAKING DAY!

Yes, it's true! Today is World Card Making Day! I have been busy making cards today and can't wait to just post this one and then head back to my stamping area and create some more. My kids are playing in the basement and so that makes it so much better for me to craft. We can all be in the same room and the "Mother's guilt" doesn't surface too much. It is a lazy day here. We have needed this. My kids are still in their PJ's. Don't you LOVE days like that? In fact we may just have breakfast for supper again. Nutritionally, soo bad. But crafting wise this is soo good. Tee Hee! Ok..so onto the card...


This is from the technique challenge given on Monday for Splitcoast Stampers. The technique is called Batik. You may have seen this on clothing. Here is a bit of info about it...

Originated in India, the art of batik has come a long way from a mere handicraft. The word batik actually means 'wax writing'. It is a way of decorating cloth by covering a part of it with a coat of wax and then dyeing the cloth. The waxed areas keep their original color and when the wax is removed the contrast between the dyed and undyed areas makes the pattern.

Here is a link of different batik sarong patterns for inspiration

My batiking was done a bit differently than the directions given on Splitcoast. Mainly because I am cheap. I didn't want to waste materials or have to buy something new to do this. So mine may look a bit different than others. The idea is relatively the same. Here is what I did:


* Using watercolor paper, I stamped my leaf images in VERSAMARK.


* I then applied CLEAR EMBOSSING POWDER


* Using a heating tool, I heat set the embossing material until the images are shiny in appearance. Make sure to check this as I have sometimes found it hard to see if all areas are thoroughly melted when on white paper.


This next step is where mine differs slightly. The original directions call for spritzing bottles

I did not have spritzers nor did I want to have to use as much reinker as would be needed to spray from the bottle (even diluted). So I placed a few drops in each well and dipped my watercolor brush in water, then reinker and....


....swiped each color across my canvas of paper. I used 3 colors...really rust, old olive and more mustard. I found out that I didn't have a really rust reinker(try to say that fast 10 times:) so I simply "colored" the inside of my well and then dipped my wet brush onto the color. It took a bit longer and I don't think the color is as intense. But, it worked.

*Now wait for this to dry.


* Ok, Whatever! I could not wait. So, I sped the drying time up with my heat gun.


* Now place the paper between 2 sheets of copy paper and iron WITHOUT steam. Continue ironing until all of the embossing material has melted off of the watercolor paper and onto the copy paper. The copy paper is used to protect your iron. So, don't skip that part.


* This is what the top of your copy paper should look like.

I hope you try this technique. There are so many different possibilities with this.


Ok, off for more stamping and crafting. I hope you get to create this weekend.